Friday, November 15, 2013

Fruit Salad and Tunic two


Schoolhouse Tunic
I feel a little like goldilocks making my first attempt at the Schoolhouse tunic too small and my second too big..but I think with a tiny bit of tweaking it will be just right.

Finally a FINISH - yes, binding is sewn on and I'm happy with how Fruit Salad came out.  These blocks are from NuBees, 3x6 and 4x5 and it's a good thing they aren't perishable because they've been sitting around a while.
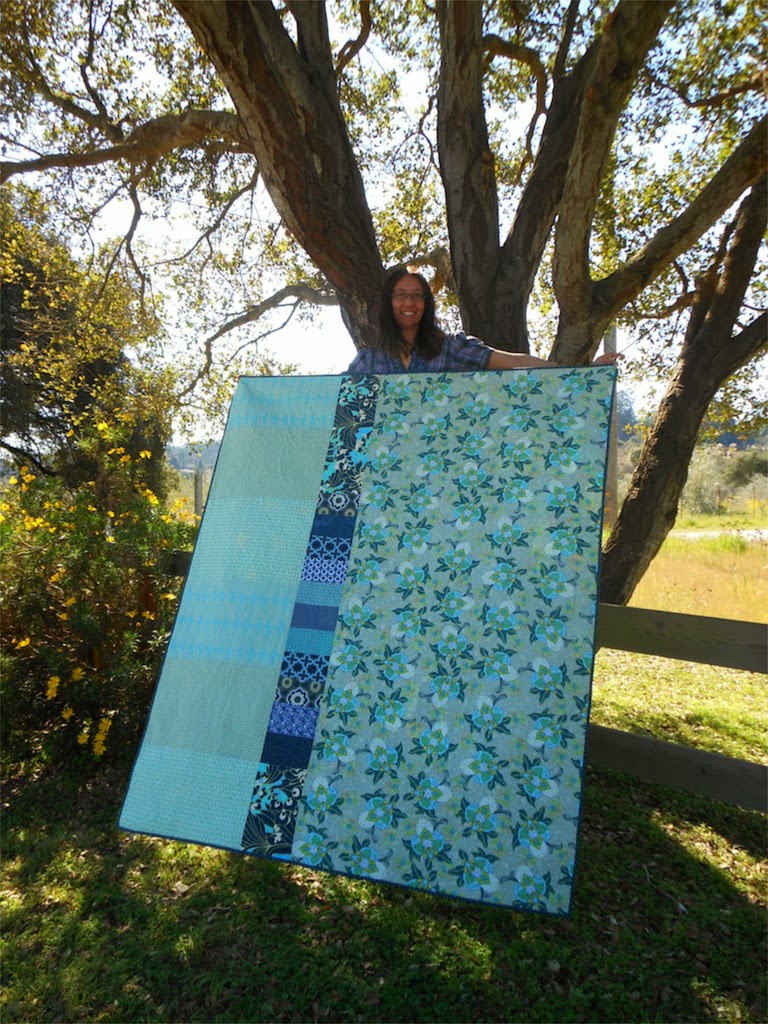
I had grand hopes of sneaking off to the local Farmer's Market and draping it over some bananas, raspberries, papayas (you get the idea) with it for a proper photo shoot but since that didn't happen this tossed over the sewing chair shot will have to do.  (edit: I added this display shot) 
Hanging at the December Quilt Show - Gifted
Wonky Braid Block
My other two finishes are for f+f2 November and here's a one of them.  
If the formatting is a little wonky on this post it's because I've finally joined the rest of the world and own an iPhone - getting all of the apps to talk to each other is challenging but will be awesome!

Linking up to Finish it Up Friday at Crazy Mom Quilts and for the FAL Q4 linky party.

Wednesday, November 6, 2013

I'm Back with Backs - WIP Wednesday

I'm Back with Backs

The Quilt Retreat was amazingly perfect -if I do say so myself- and chairing the event for the second year with a rock star committee did make things a bit easier.  I'll tell you all about it in a blog post but until then you can get a feel for how much fun we had from the flickr photos.  I dabbled in lots of projects but focused mostly on backs.
Koi Pond 
The grounds were so peaceful and I had to take this picture because it made me think of the Baby Koi and Pond Parents Halloween costume I made for my son's Zen Family.
Bonus HST for xPlus Backing
These will be sewn in a strip between the two fabrics on the right and I'm using an orphan xPlus as my siggy block.  My Giant xPlus with bonus HST tutorial recently featured on Leanne's blog hop has now been been added here.  This is my November ALYoF goal and one of my Q4 FAL projects and top priority.  I cut my binding the length of fabric so there will be very little piecing - yeah.

I was recently re-inspired about backs thanks to The Other Side of The Quilt linky party with Katie at   SwimBikeQuilt.  There are 167 and counting. Did you add yours?? Link up is still open for a bit.
fabric for xPlus backing
My project packing approach for our SBAMQG 2nd Annual Fall Quilt Retreat this past weekend was about as opposite as it could have been from when I prepared for the BamQ Retreat last Spring.

Maybe it was because theirs was a UFO theme and the thought of cranking out some finishes had me all organized - with a spreadsheet, grouped front/back/binding and pre-measured batting.   I laugh at myself re-reading this blog post - it says a dozen to go but I kept adding more.

Floor Galore
Or maybe it was because I was so excited I geniunely cared more that all the swag bags, prizes and supplies were in order than what I'd actually be sewing on.   The massive floor space was ideal for laying out backing -we were so spoiled!

Back for Rip Curl
The design of this one changed a half dozen times from the design wall to the sewing machine - it was like playing with the magnetic origami puzzle my kids had.  I brought it for Show & Tell at the guild meeting last night since not everyone came to the Retreat...although 25 attendees for a small group like ours was a pretty high %.
Back for Fruit Salad quilt
Back for Baby Birdy quilt
Mixing flannel with quilt cotton is new for me but this yellow floral was just too perfect to pass up and I wanted to use the extra blocks from the front.

linking up to WIP Wednesday with guest host Kelly from My Quilt Infatuation. 

Finished: 1
Our MQG's 2nd Annual Fall Retreat
Progress: 6
xPlus Back
Rip Curl Back 
Baby Birdy Back
Baby Birdy top
Fruit Salad (sandwiched, quilted and binding started)
second Schoolhouse (cut out)
To Do:?
Prep for Saturday's workshop Tile Quilt Revival
2 WonkyBraid Blocks f+f2 Nov
unpack and recover from the Retreat

Friday, November 1, 2013

Linky and Lucky

Second Annual SBAMQG Quilt Retreat Starts Today

Feeling Lucky

I'm so fortunate to be part of the South Bay Area Modern Quilt Guild and this weekend we are holding our second annual Retreat in the beautiful Santa Cruz redwoods.  Planning and plotting with my committee-mates has been a blast although I'm not very good at secrets so it'll be nice when I can share some pictures of what we've been up to.

Explorer


This is the second time Anne at PlayCrafts quilt has been on flickr Explorer in MY photo pool.  Her Broken Herringbone tutorial can be found here. Last time it was her Mod Pop picture from the 1st annual Retreat.  I had just read this post on Live a Colorful Life about a similar thing happening with a photo her daughter-in-law took.

A Win Win

Have you been following along with the major eye candy of Fall Quilt Market?  Timing could not have been better for me because I won not one but two link-ups recently and have gift certificates to spend!  Thank you sponsors and hostesses: Pink Chalk  from Leanne at She Can Quilt / Finish It Up Q4 and Fat Quarter Shop from Katie at Swim Bike Quilt 100 Quilts for Kids.

Voting is Open

My last two posts have been reruns for my followers who've seen plenty of Ring Around the Briar Rosies #36 and Tassels #25, but hopefully interesting to anyone new who might be popping in as part of Blogger's Quilt Festival.  Be sure to continue to check out the linky party at Amy's Creative Side because it is a wealth of inspiration. Voting opens today!

Zen Family

I was so happy to be in charge of by baby grand girl's first Halloween costume.  No trick and all treat, this little Koi and her Pond parents stopped by last night.  She's sweeter than candy with all her adorable expressions even after a big day out and about.
Originally I had planned to start from scratch and use a pod/bunting pattern but I found this 0-6mos Pottery Barn goldfish at the thrift store and modified it instead. 
 The pond ponchos were embellished with a couple dozen lily pads made from green stash flannel drawn on with a sharpie and then sewn by machine.  I even found a lotus flower in my gift wrap box and attached it to a barrette (with green hose tape of all things!)  I forgot to take a picture of the coordinating burp pad but heard it came in handy. 

Lastly

Time for a November LYoF goal to be set and I'm choosing my x-Plus quilt. Here's the top - next time you see it I'm hoping it will be a completed quilt:

Linking up to Crazy Mom Quilts Finish it Up Friday and Lovely Year of Finishes November goal 

Sunday, October 27, 2013

Blogger's Quilt Festival - Group/Bee Quilts

My Group/Bee Quilts entry for Blogger's Quilt Festival at Amy's Creative Side Fall 2013

TASSELS

friends+fabric = a modern stash bee 


When I discovered online bees and swaps I was overwhelmed by the possibilities - I had NO IDEA such things existed!  The wonderful ladies in friends+fabric=a modern stash bee (f+f=amsb) invited me to join my first ever year long 12 member group and Tassels is the lovely result.

The Photo Shoot - Showing off Tassels

This quilt was special and deserved more than the classic front porch shot.  It had been a long time coming and was going to be ALL MINE!   These pictures are from a sunny day in Corralitos with friends -it was fun posing and staging.  Trying to capture both the light and dark portions was tough.


The Tutorial

My very first tutorial was definitely a challenge because I tend to change my mind along the way and this was no exception. The test block had a center star instead of two tassels - the same four segments just oriented differently.  I tried my best and was pleased to have pushed to try something new and my bee mates were so supportive.    
original orientation of the parts created a center star

The Assembly

Although I love my own stash - it was really fabulous to see what arrived in the mail.  Blue has such a wide range of shades and I was going for a specific gradient look transitioning with the yellow to mustard tassels.  My bee mates did not disappoint.  The pops of pink and red scattered throughout that I had not originally envisioned add a bit of whimsy. 
Blocks on the Design Wall 
The blocks had been sitting taunting me since they arrived so I brought them to our first SBAMQG Retreat to sew together.  It was a big hit and playing name that Modern Fabric Designer "I Spy" entertaining.
I realized that it was a bit too tall and skinny so I ended up unstitching the bottom row and adding a column to one side.  This also helped balance the flow from light to dark. 

The Backing and Quilting

Orchids hold a sentimental place in my heart because they remind me of my dad.  The Art Gallery fabric for the backing played along well with a dark scrappy narrow strip and light chunky section.  
piecing the backing
Choosing the thread color and design was tricky because of the range of colors. I opted for a random geometeric FMQ using a medium blue.
pin basting
FQM details

The Inspiration and Specs

Tassels was inspired by my Crush Quilt that I made using Cheryl Malkowski's Dancing Twilight pattern.  Although it does look quite similar,  I used a different technique to create the blocks and changed the proportion for the 12.5"x12.5" bee block. 

Started April 2012 and Finished February 2013
Finished Size: 61"x 73" (although I must say it feels BIGGER!)
Pieced and quilted by me on my BabyLock Symphony
Aurifil 50 and 40 thread
Natural Bamboo Batting
Friends+Fabric=A Modern Stash Bee

Friday, October 25, 2013

Blogger's Quilt Festival - Baby Quilt

 My Baby Quilt entry for Blogger's Quilt Festival at Amy's Creative Side Fall 2013

Ring Around the Briar Rosies

We found out our son was having a girl when Heather Ross released her newest line Briar Rose with Windham Fabric and I knew immediately what I wanted to do.
My new baby grandgirl enjoying the quilt
Despite the incredible amount of (self imposed) pressure involved in creating the first quilt for my first grandchild - and I'm happy to say I thoroughly enjoyed the process and am proud of the outcome.  The possibilities were endless and the choices to be made overwhelming but they all fell into place like it was meant to be. 
Flat on the design wall 
I love how crisp and fresh a top looks when it is done.  The added texture of FMQ takes it to the next level.  Each fabric inspired the quilting shapes ranging from an oval strawberry to a leafy clover.
Pieced on my Baby Lock Symphony with aurifil 50 and quilted with aurifil 40 in a light shade of pink on the background.  I used Natural Bamboo batting from Winline - of course! Finished size 62"x62"
The solids are from Windham Fabric as well with Kona background and binding. 
Anna Maria Horner flannel was the perfect compliment and oh so cozy.  
Started on July 4 and finished on July 30 2013 just in time for the Baby Shower.
Quilting shows on the backing a little better
Choosing a name for a pattern or quilt is something I enjoy although making suggestions for other people is way easier than deciding on my own projects so I put it out there on Facebook and Flickr.  Thanks to katedeerie the pattern design is called Skipping Stones, she said "the circles kind of look like the plips in the water after a rock skips across them" and she so right!

Anne and Emily helped name this particular quilt Ring Around the Briar Rosies - thanks ladies.

Coming up with an original design using my favorite Quick Curve Ruler and my handy HSTs on a roll was really fun and incorporating the fabrics of two of my favorite designers makes this quilt even more special.  
Me & Heather !
This is my third time participating in Blogger's Quilt Festival (Catalyst: Spring 2012 and Old Italian Block aka OIB Wedding Quilt Fall 2012)- how about you? Be sure to check out all of the amazing quilts and cast a vote for your favorite on Nov 1.

This year Amy has many great prizes plus she's giving readers a chance to win a Baby Lock Melody sewing machine.  Why do I want to win the Melody? That's easy, because I love my Symphony but I think a little sister Melody would be much more portable for taking to Sew Day.
My Symphony would love a baby sister Melody

Thursday, October 24, 2013

Giant xPlus Block with Bonus HST Tutorial

Giant xPlus Block with Bonus HST Tutorial 

 This Tutorial variation was inspired by:
 Amy/badskirt 8" 
which she credits inspiration to Setsuko Inagawa's quilt and original block attributed to Nancy Cabot. 

Me & My Mixed Scale xPlus Top

12.5" blocks Mixed with 24" blocks
A few weeks ago my picture caught a lot of attention on flickr and comments on a recent blog post so when Leanne at  She Can Quilt invited me to be part of the FAL Q3 Guest Tutorials, it was perfect timing.  I've only written a tutorial twice before;  Polaroids and Tassels and have never been a guest blogger - so if all of this seems a bit rough around the edges you'll know why!
Thanks for having me, Karen

24" Block Cut List:

Plus Center  = Two 4.5"x 4.5"and One 4.5"x12.5"
Plus End Tabs = Two 6.5"x 4.5" and Two 4.5"x6.5" (or Four 4.5"x 6.5 if non-directional)
Background = Eight 6.5"x6.5"
X = Four different fabrics, each 10.5"x10.5" (fussy and non-fussy instructions given below)
all seams 1/4. all seams ironed open.

the FABRIC Grouping

Audition and Decide on Fabric Placement
The look of the block varies greatly based on your choices, so have fun deciding what goes where!
Another Fabric Grouping Sample
Take a picture for reference later, especially if you are chain sewing several blocks at the same time. 

the PLUS

Plus Center
Cut Two 4.5"x 4.5" and One 12.5"x4.5" for the Plus from the same fabric.
Above you can see a fussy and a non-fussy version.
Plus Ends
Cut Two 4.5"x6.5" and Two 6.5"x4.5" for the Plus End Tabs of the same fabric if your fabric is directional like the sample below. Later, you'll also need to pay attention to orientation during assembly OR you can cut Four 4.5"x6.5 of non-directional fabric stacked like the picture above.


 the FUSSY X

Using a 12.5" square ruler, cut a visual guide out of tracing paper 5.5" wide. Draw a line down the center.  Place it on the mat using the 45 degree line & vertical reference (see arrows). Cut one tip. 
Cut the First Guide Tip
Reposition the ruler on the tracing paper at the 10.5" line shown below with red arrows and at the center line on the guide shown below with a green circle. Cut the second tip.  
Remember that this is not a cutting template, but rather a visual guide for the X portion of the block. 
Cut the Second Guide Tip
Mark the center of the guide and tape it to your ruler. Play around with the fabric pattern repeats until you find what you like. Because the block is Jumbo, you can highlight special larger scale prints.

Cut the two sides where your tracing paper is at the ruler edge, shown at the top of the photo above.

Reposition the ruler and cut the other two sides to get a  fussy 10.5"x 10.5" square.

the NON-Fussy X option

Cut a stack of 10.5" squares. I prefer the look of mixing fussy and non fussy x segments together.

 the BACKGROUND

Cut Eight 6.5"x6.5" Background.  For a high contrast, pick something that is similar to your Plus Center fabric and different from your X and Plus Ends fabric since they will touch.

Draw a line down the center of the wrong side of the background squares tip to tip and another 1/2" from it on the outer side only.   These will be your STITCH lines. 

Align the background squares with the edge of the x square and put one pin where they overlap and one pin near each outer point to help keep things in place. 
Chain piece all of the center lines on one side, then the center lines on the other side. 
Do the same for the outer lines. Easy as 1, 2, 3, 4.

The bonus half square triangle are well worth the second pass because they're so large. 
Cut 1/4" from the center line right between the two stitch lines.

Here are the X parts once the background bonus half square triangles have been trimmed off. 
Press seams open being careful not to stretch or distort the square because they are now on the bias.
Close Up on one fussy cut X segment 

the ASSEMBLY

Sew a 6.5"x4.5" Plus End to the left and right of the Plus Center 4.5"x12.5".  
Sew a 4.5"x6.5" Plus End to the Plus Center 4.5"4.5" and repeat to make two.
Refer to the numbers and picture above, pressing open seams between each step: Sew an x segment to each side of the vertical Plus,  repeat to make two. Sew the horizontal seams #3 & #4 and you're done!
During the final assembly steps I pin the ends and along the joints but I don't stress about perfect joints.

the BONUS HSTs

Measuring just shy of 6", these are totally usable parts for another project and you get eight from each block with little extra effort.  I will probably clean up them to 5.5" before sewing them together. 

the SAMPLES 

Sample of a lower contrast background.
Sample of using all very similar X and Plus Ends
Four 12.5" blocks sewn together join nicely to the 24" blocks. 
Another shot of my Mixed Scale xPlus Top