Showing posts with label challenge. Show all posts

Sunday, May 26, 2024

Medallion Mashup 01 - Finish 4 in '24

Medallion Mashup 01

Time is zipping by as we sneak up on a new month and another season, I'm so pleased to present "Medallion Mashup #01" as the fourth finish in 2024 and my final Aurifil Artisan challenge.  

We were tasked with sharing our very favorite thread weight which isn't easy to narrow down with so many wonderful products and a range so broad.  Maybe it's because the quilting is such a dramatic step in the process that the Forty/3 cone of Aurifil cotton stands out to me or maybe it's just that not all of my quilty friends have discovered it and I want to spread the word.

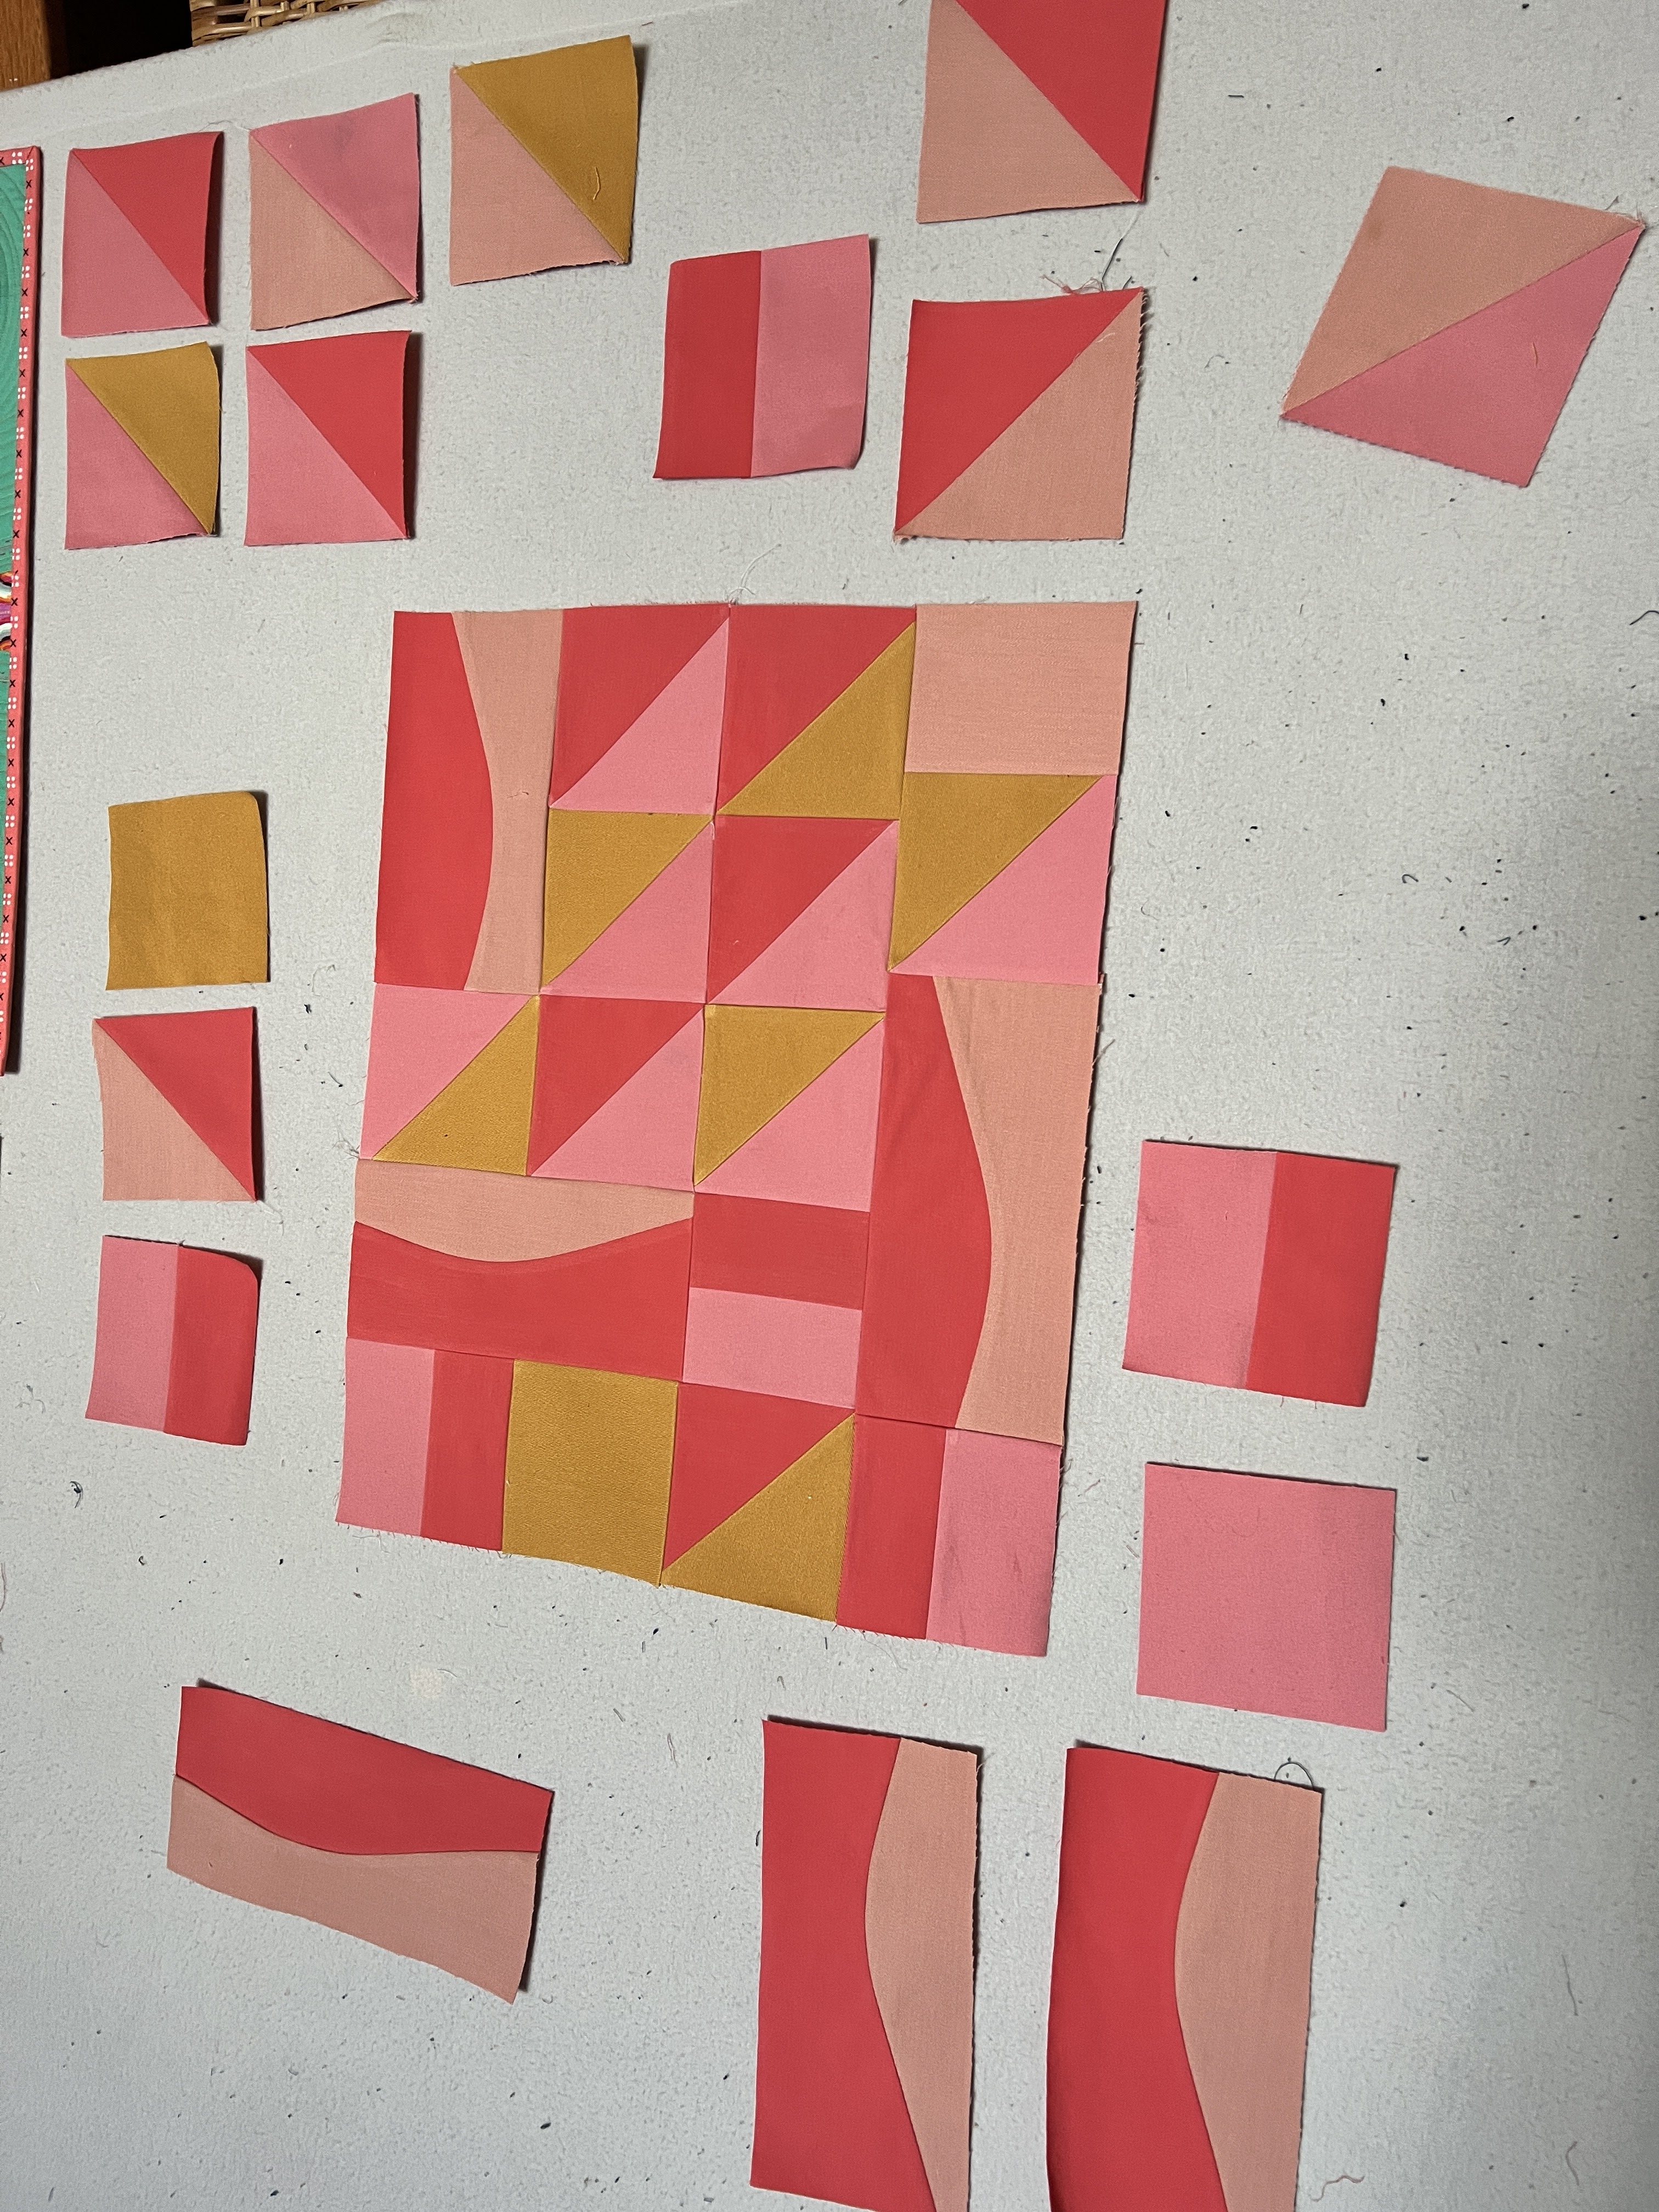
Medallion Mashup #01   54"x54"

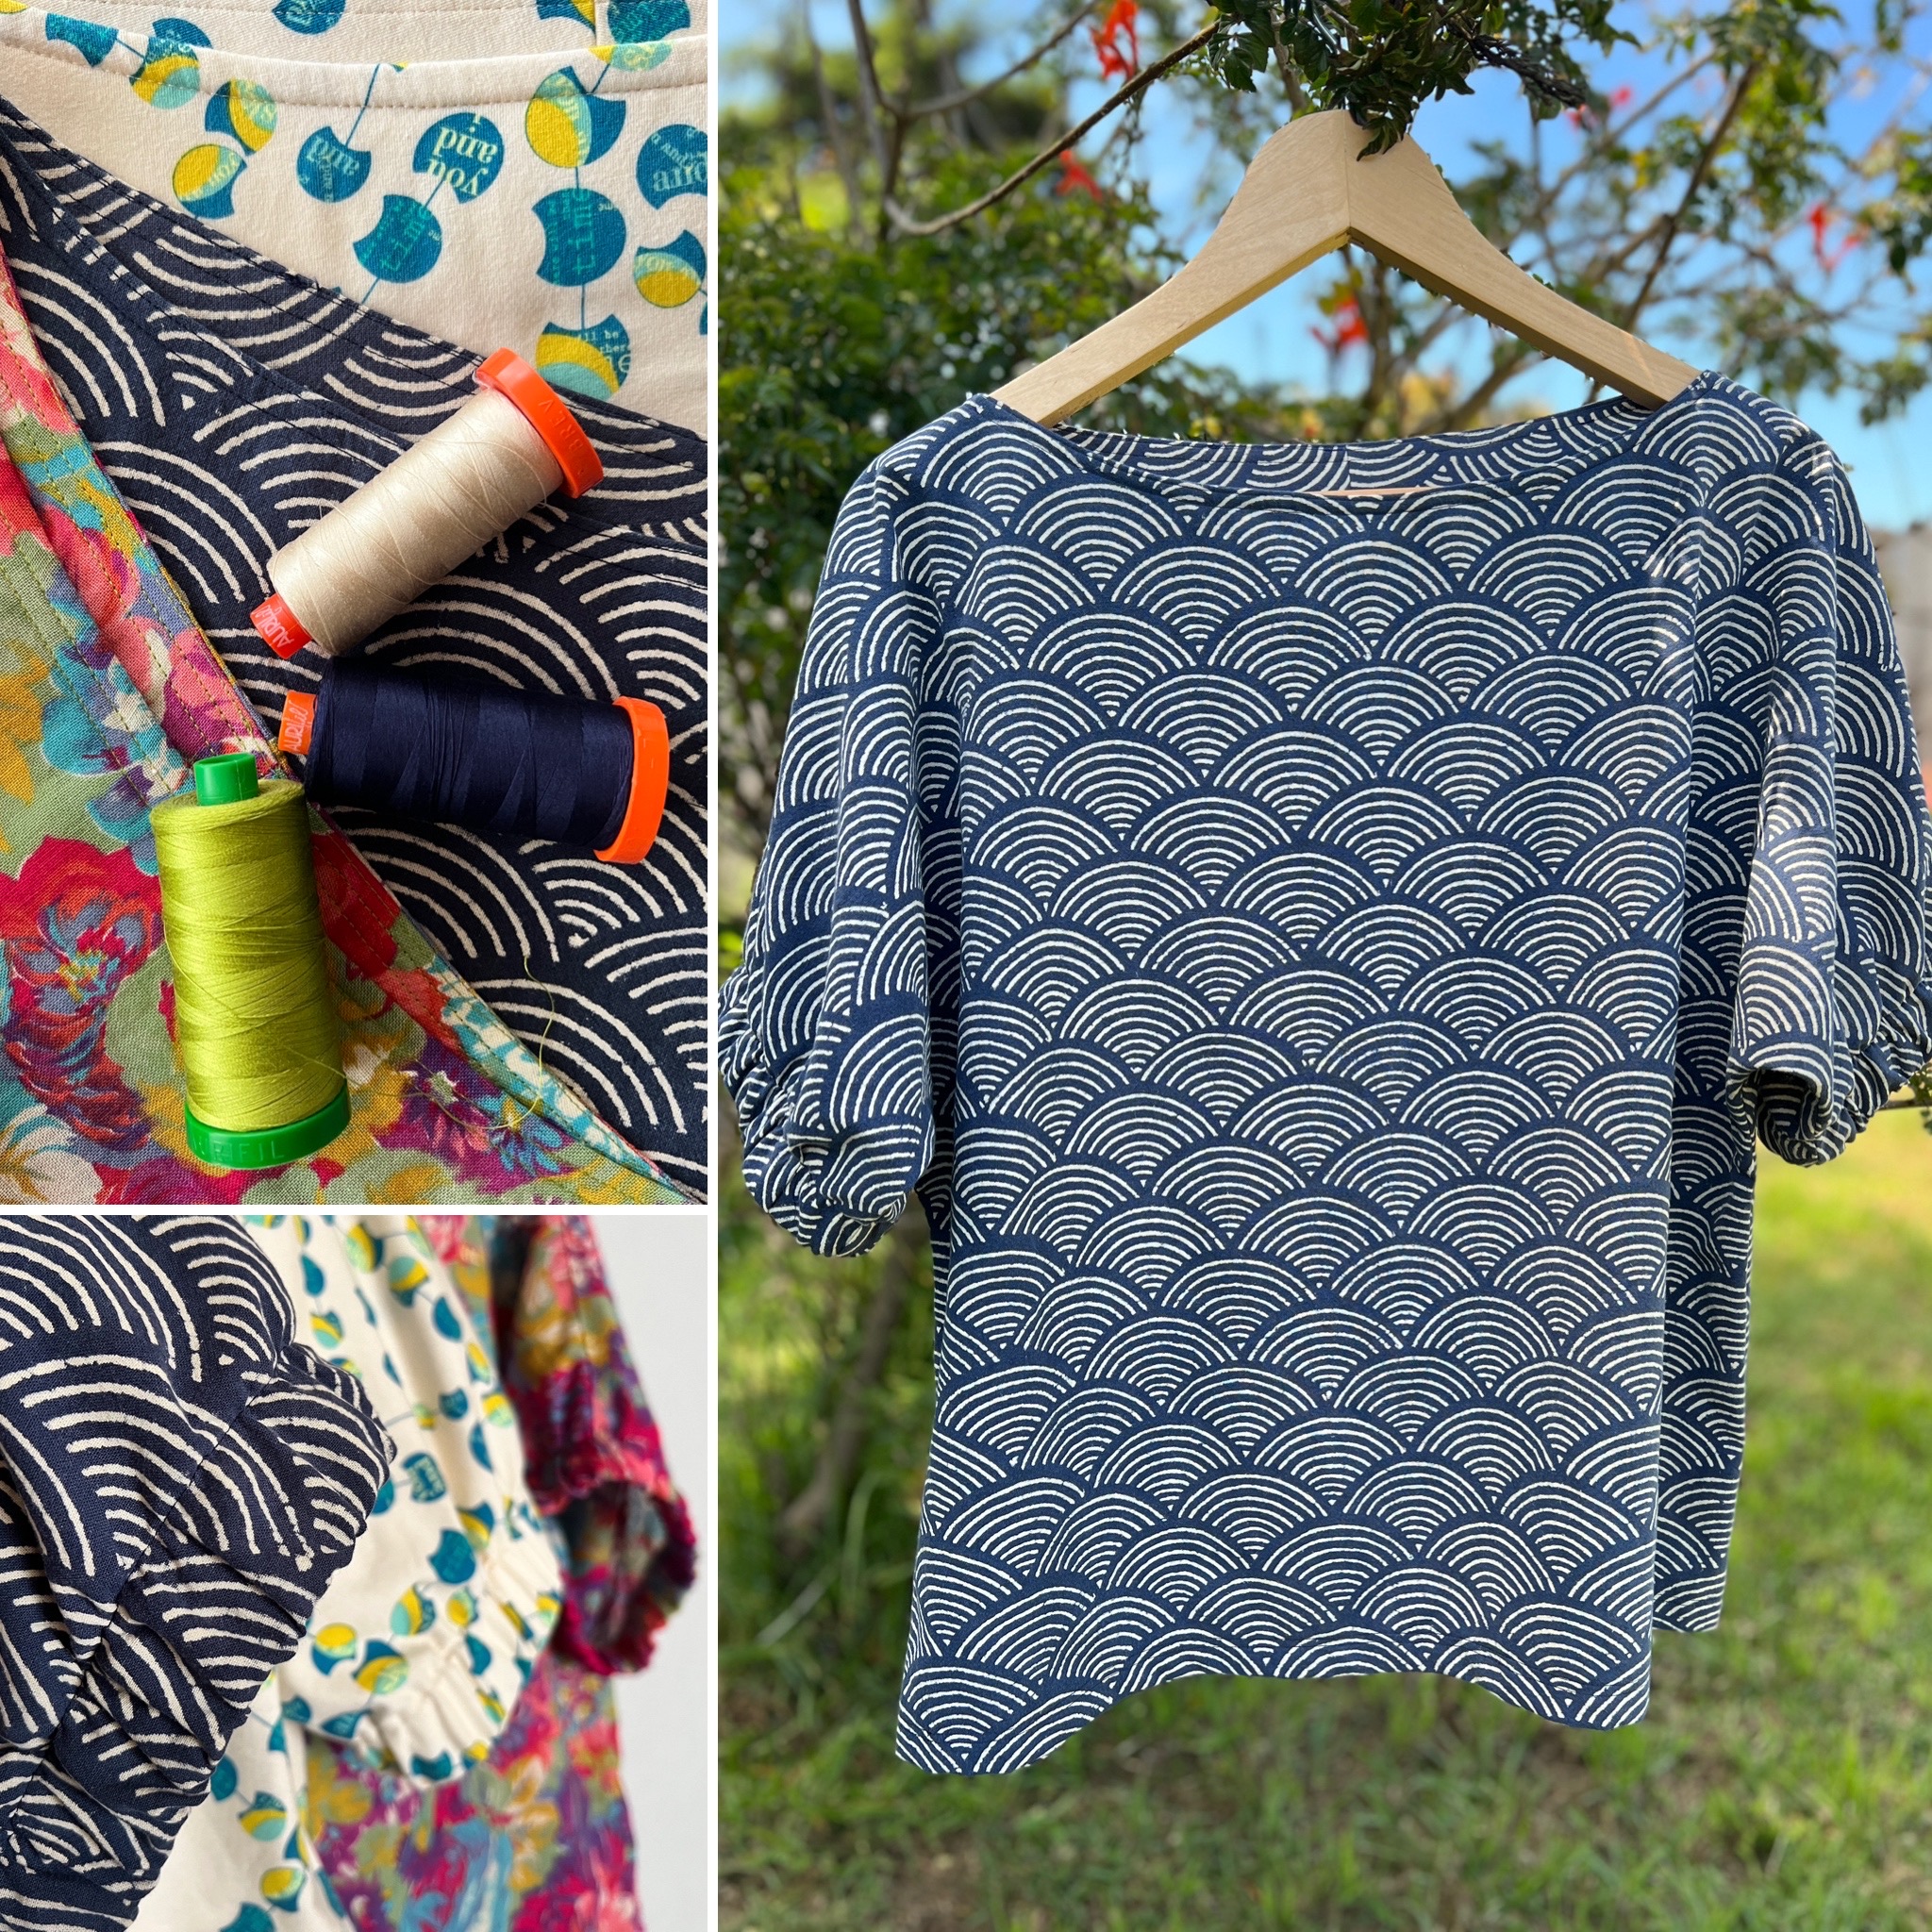
You would have guessed that being a Pantone Color of the Year challenge that I'd go with something along the lines of Peach Fuzz and while I did audition the color Shell shown below, the overall stitching motif would cross into the darker greens and blues giving the final selection of Light Grey Green the upperhand.

Auditioning quilting thread

I have the good fortune of having access to my friend's longarm and am trying very hard to embrace her recent upgrad to a computerized system.  The learning curve is a bit of a struggle and as soon as I think I've wrapped my head around what I'm doing there's a set back.  Repositioning as you can see below left a line gap and this happened each time that I advanced the quilt.  

Computerized Quilting

Fortunately the simple fix was to use the same cone of Forty/3 at home and fill in freehand which isn't perfect but certainly an acceptable solution.  I continue to brave on and am grateful not to be quilting entirely on my domestic machine.  

Quilted and ready to trim

The title of my quilt "Medallion Mashup #01" is an obvious giveaway that I do intend to make more.  Although I've been on a series of medallion quilts for several years, this Mashup idea is something that adds a twist and deserves a timestamp.  

80 wt Applique Hexi 

There is something quite satsifying about dusting off parts from an old quilt along like the New York Beauty blocks,  using up hexis left over from a bag swap more than a decade ago and seminole strips from a workshop - making them all play together with newer and brand new units. 

I'm thrilled to have the opportunity to share my work at the upcoming Medallion Medley PVQA Special Exhibit at the Pacific International Quilt Festival PIQF Santa Clara Convention Center show in July.  If you're local I'd love to see you there!

Aurifil Threads used:
Piecing 2600 Dove 50wt Cone  
Hand Applique 2220 Light Salmon 80wt spool
Longarm and Domestic quilting 2843 Light Grey Green 40/3 wt Cone
Domestic and Handstitch Binding 2865 Emerald 40wt spool 

Hobbs Batting 80/20
Babylock Symphony
HandiQuilter Avante

2024 Quilts - Catching Up

My previous blog post featured the first completed quilt for the year but I hadn't yet added the 2024 Quilts tab to the header until now.  Finish number 2 and 3 were both quilted with Forty/3 weight Aurifil as well.  

You may notice a similarity in palette for these three quilts and even a few of the same fabrics in each.  Let's just say that putting away my pull from one project isn't a favorite step and that one thing leads to another.  


Gifted to my granddaughter and designed with the help of her sister, I just love the uniqueness of the Flowering Snowball blocks layed out to create the quilt cleverly named "Flowering Poppies". 

Aurifil Forty/3 


Flowering Poppies

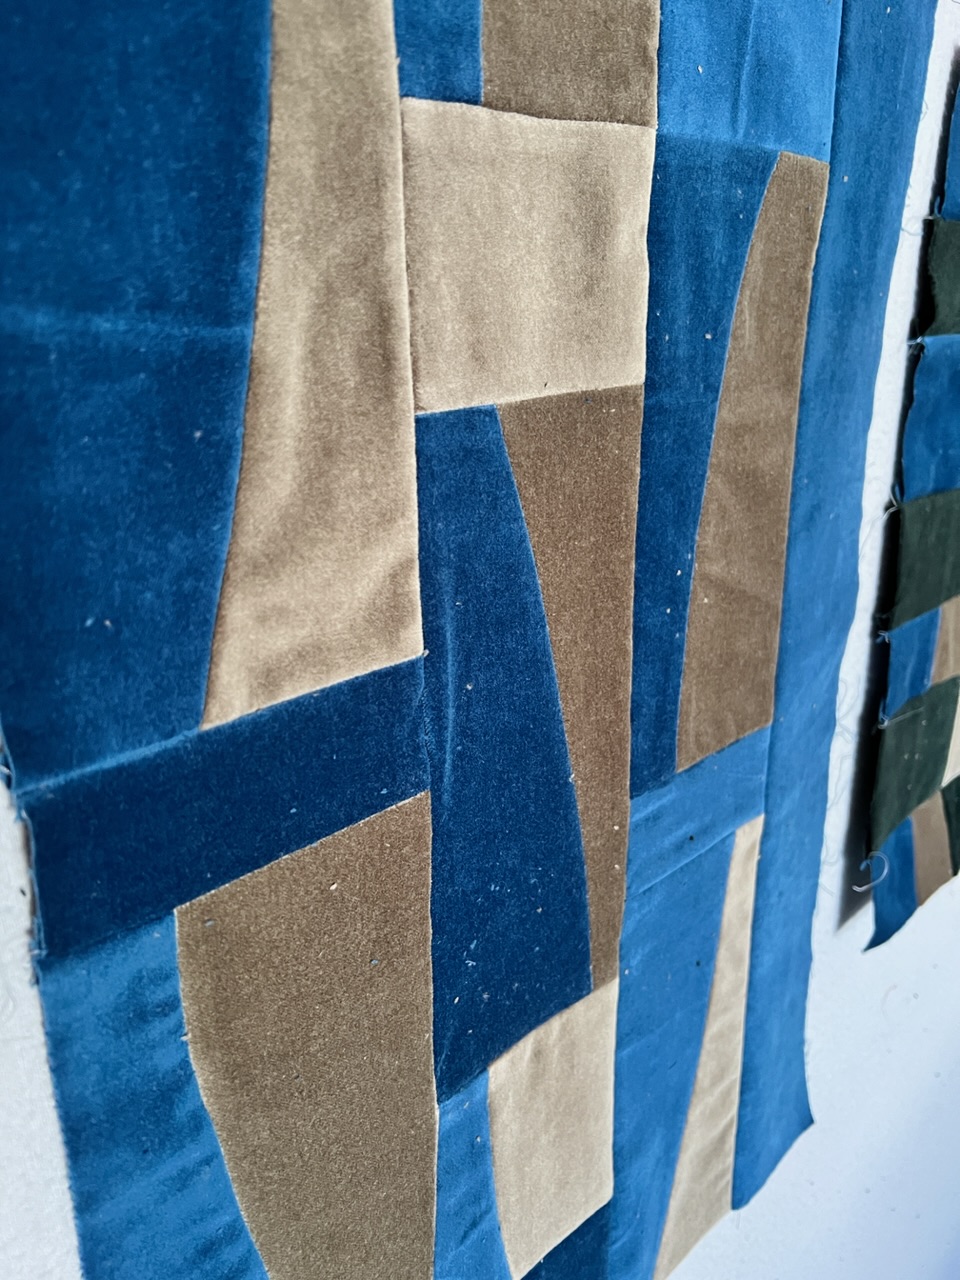
MQS Secret Agent QAL 

Modern Quilt Studio QAL was all about transparency and the theme was Secret Agent.  I chose to use my own stash in a palette that was inspired by nature so naturally a photoshoot in the redwoods was a must. 

Fabric Code 

Pairing 11 sets was more challenging than I thought given just how much fabric that I own. With the added element of a Mystery I'm really pleased with my choices.  Four of the eight half-circles were the only blocks that I remade using a slightly higher contrast.   


Tuesday, March 19, 2024

A Graphic Finish


Introducing my first quilt finish for 2024 and it is yet to be named.  Any suggestions? It's graphic, made with solids, linear, color blocked - reminds me a bit of an arial view of a quilt show floor.  


I used 7 threads, 6 different colors in 4 weights for my March Aurifil Artisan challenge to create with at least three colors. 


Above are the four that I pulled initially auditioning on my sandwiched flimsy.  I decided to add another similar yellow to use for dense machine stitched lines.


 I like the contrast of texture the 12 wt gives especially with the freeform multi-directional stitch. I was surprised to find that the fully random placement actually took more concentration than the 3-seed I've done before.  With such a narrow strip of fabric it could have also been the simple fact that there aren't a lot of places to go! 


For the binding thread, I used the same color Dark Carmine Red in a 50 wt that I had used for the 28 wt quilting even though the fabric was slightly different.  Brown was the most understated color so I couldn't resist adding a dab to the binding. 


Matching the thread to the fabric and combining a varied density within the quilting resulted in the visual texture that I was hoping to achieve. 

Aurifil Threads: 

50 wt 
2115 - Lemon
1285 - Medium Bark
2460 - Dark Carmine Red 
2312 - Ermine (not shown) for piecing 

40 wt
2450 - Rose

28 wt
2460 - Dark Carmine Red

12 wt
2120 - Canary

As always, be sure to check out the other Aurifil Artisans to see what they've made.  


Friday, December 22, 2023

Beginner Friendly Quilted Bucket Tutorial


For our December Aurifil Artisan challenge I chose to make a couple of quilted buckets. Having sewn similar from thread catcher patterns and online tutorials, my goal was to end up with ones that served the same purpose and were visually pleasing but constructed with simplified steps - omitting my dreaded tasks and adding in my most favorites. 


The quilting itself can be elaborate like the blue example, straight line stitching like the floral or anything else the maker feels comfortable doing.   Because the fabric bucket can be used for whatever you want - the measurements are only a guideline.  You can use any rectangle size you prefer.  

The front and back are the same size and the bottom is a 2" strip the same as your width.  These were cut two @ 6.5"x8.5" and one @ 2"x8.5" then sewn together as shown below.  Measure the size of the newly sewn rectangle unit and jot this number down to refer to when it's time to cut your lining. My example measures 14" once stitched. 


Keep in mind that the sides and bottom will wrap so you'll want to avoid positioning your favorite part of the fabric near those edges.  

Fold your sewn rectangle unit in half right sides together and stitch the sides as shown below.  Next, using a ruler mark a 1 1/2" square using the bottom fold line and the side stitch line then cut with scissors. 
Right sides together, fold to line up the side seem in the center and sew the raw edges from the cut out portion together.  *edited to include a step by step visual mosaic for boxing the bottom. There are a lot of video tutorials available that you can search and refer to as well. 


Repeat on the other side to form a boxed bottom.  Turn the bucket exterior right side out as shown below   


Including a bottom strip may seem like an unnecessary extra step but it not only allows you to orient directional print correctly but it also helps create a flat stable base.


I had originally picked the honeycomb fabric but felt it was too bold and graphic so I auditioned more from my stash and was happy with the dustier palette and organic scallops instead. 


Depending on how much of the lining you would like to show as the top accent, take the measurement that you jotted down from the exterior sewn rectangle and add about 1" to 1.5" to the longest.  In my example the exterior was 14"x8.5" so I cut my lining 15.5"x8.5".  Note that the width remains unchanged.


Construct your lining in a similar way by sewing the sides, cutting the 1 1/2" squares from the bottom and boxing it.  A couple of things are different for the lining: You leave it wrong side out and you fold and press the top down 1/4" and then again to meet the exterior. 


Set the lining inside and fiddle with the amount of fold until it rests flush.  If the amount of fabric showing is more than you like, simply refold the 1/4" raw edge fold more to reduce the visible accent rim.  This flexibility to easily alter the look and have a forgiving fit is the way I like to work.


Machine stitch around the top to secure the lining.  You can see that I sewed close to the edges and through the middle of the lines but you can include as many passes as you like to make the top even more structured.  I used 2930 Golden Toast 50wt for piecing and 40wt for topstitching. 


An alternative to topstitching multiple lines by machine is to hand sew with 12wt.  I love the look and texture it gives the rim of the floral bucket and think the treatment compliments the 40/3 wt channel stitching well.


This method is also more beginner friendly for those who struggle with aligning topstitching by machine.   I like not having to leave a side seam open for turning that needs to be sewn closed after like commonly done in other patterns.  


Fabric and batting scraps are perfect for this project and they make great gifts.  Even though similar quilted buckets are marketed as thread catchers for quilters, they come in handy for storing lots of other things too. 


Timing was perfect for these two projects.  I was able to complete both despite the busy holiday season and gift them to my swap partners without the stress of complicated construction.  Pairing fabrics and thread to personalize them for the recipients is where I'd rather focus my creative energy. 

Aurifil Threads : 
2930 Golden Toast 40 wt and 50 wt 
2715  Robins Egg Blue Fory/3 wt
2250 Red 12wt 
5020 Light Military Green Forty/3 wt


Tuesday, May 23, 2023

Me Made May - Cuff Tops

Inspired to participate in the May Aurifil Artisan challenge, I decided to try a new pattern and ended up making it three times. 

Because there’s a lot of topstitching in the Cuff Top pattern, I auditioned and strategically chose 1147 Light Leaf Green 40wt to blend well with the multicolored palette of the floral fabric from my stash, a vintage loose weave gauze. 

The next make was an easy pick for the thread color, 2785 Dark Navy to complement the indigo block print cotton.  Cut slightly boxier, I put the pattern on the fold without reducing for the center seam allowance called for in the original instructions.  


On a roll with my garment sewing success and curious how a knit might turn out, I whipped up a third and final with 50 wt Light Beige 2310 remembering to use a jersey needle and the stretch stitch setting on my machine. 


My friend destashed a roll of thin muslin to me and it has saved me from having to buy pattern tracing fabric - a bonus!  


Before the Cuff Tops

Following a pattern is much quicker than self drafting like I did for this blouse made for my granddaughter.  She's happy with it and that's all that matters. 


50wt Aurifil Slate 6720 was the perfect blue thread and our pink rhododendron a picturesque backdrop.  Now I can get back to filling up my design wall with quilting again! 


Monday, April 24, 2023

Britches- Upcycle for Earth Day

 Playing with Parts and Possibilities is a process more so than a pattern that I have taught and made many times but never before using the fabric from four different pairs of deconstructed pants.  The Aurifil Artisan Challenge for April was the ideal opportunity and celebration of Earth Day. 


Along with my curved improv abstraction blocks, I combined traditional blocks, some freehand cut and others like the half square triangles using the Accuquilt cutter. 


Pieced with 50wt 2600, quilted with 40/3wt 4250 variegated and finished off with 12wt 2530 trying big stitch by hand on the binding,  Aurifil threads made for great teamwork . 


The two pants with 100 percent cotton content were much easier to deal with than the other two with 5 percent stretch.  The jean weight took some getting used to but fortunately, unlike my previous attempts with velvet and corduroy deconstructed pants, these did not shed. 


I purposely kept the size smaller 35" x 45" to avoid an unreasonable amount of weight for the finished quilt.


Keeping in the spirit of Earth Day, I also used scraps of leftover batting patched together.   With a graphic design for the piecing, I opted to go with a mix of playful designs on the quilting motif. 

Pressing with steam (thank you Oliso) and open seams helped with bulk and I did take my time stitching over the multiple layers. 

After a long and wet winter, the weather has been beautiful lately.  My finished BeeSewcial blocks for Debbie's April prompt "Albersesque" look so vibrant tossed on my Britches quilt don't you think? From the Josef Albers book Interaction of Color 50th Anniversary Edition, I chose inspiration from the transparence and space illusion chapter.