Friday, December 22, 2023

Beginner Friendly Quilted Bucket Tutorial


For our December Aurifil Artisan challenge I chose to make a couple of quilted buckets. Having sewn similar from thread catcher patterns and online tutorials, my goal was to end up with ones that served the same purpose and were visually pleasing but constructed with simplified steps - omitting my dreaded tasks and adding in my most favorites. 


The quilting itself can be elaborate like the blue example, straight line stitching like the floral or anything else the maker feels comfortable doing.   Because the fabric bucket can be used for whatever you want - the measurements are only a guideline.  You can use any rectangle size you prefer.  

The front and back are the same size and the bottom is a 2" strip the same as your width.  These were cut two @ 6.5"x8.5" and one @ 2"x8.5" then sewn together as shown below.  Measure the size of the newly sewn rectangle unit and jot this number down to refer to when it's time to cut your lining. My example measures 14" once stitched. 


Keep in mind that the sides and bottom will wrap so you'll want to avoid positioning your favorite part of the fabric near those edges.  

Fold your sewn rectangle unit in half right sides together and stitch the sides as shown below.  Next, using a ruler mark a 1 1/2" square using the bottom fold line and the side stitch line then cut with scissors. 
Right sides together, fold to line up the side seem in the center and sew the raw edges from the cut out portion together.  *edited to include a step by step visual mosaic for boxing the bottom. There are a lot of video tutorials available that you can search and refer to as well. 


Repeat on the other side to form a boxed bottom.  Turn the bucket exterior right side out as shown below   


Including a bottom strip may seem like an unnecessary extra step but it not only allows you to orient directional print correctly but it also helps create a flat stable base.


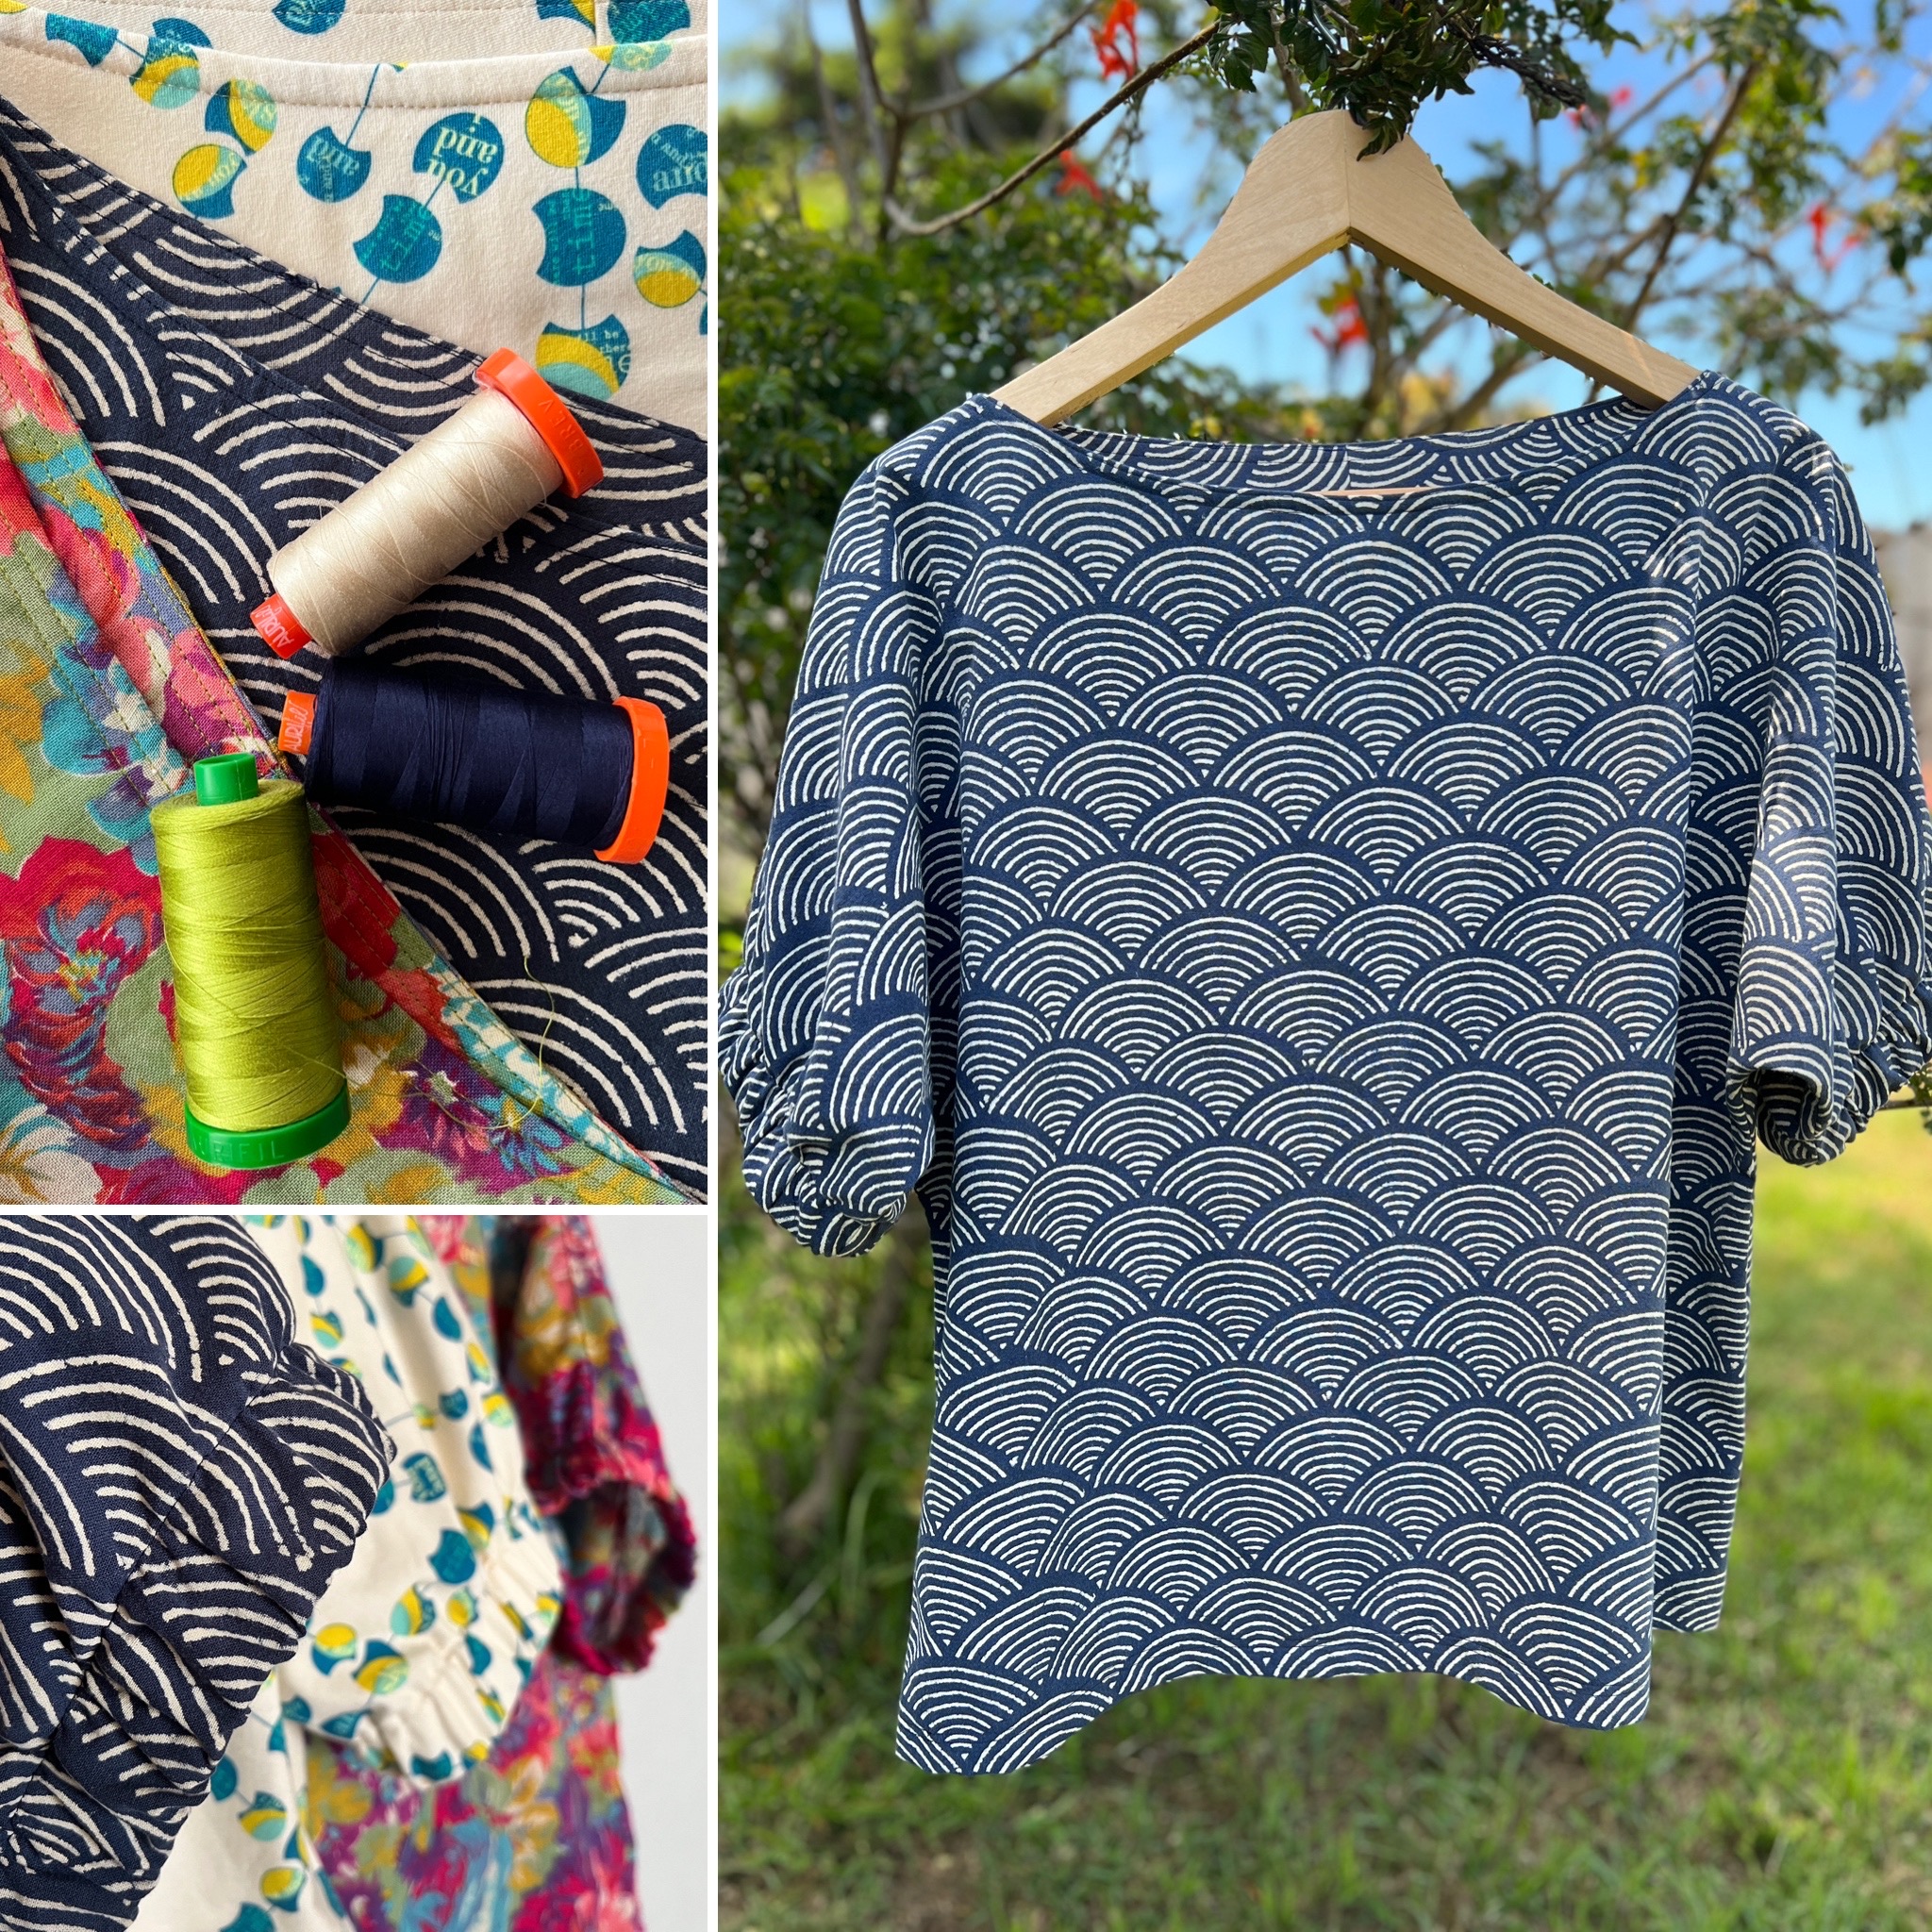
I had originally picked the honeycomb fabric but felt it was too bold and graphic so I auditioned more from my stash and was happy with the dustier palette and organic scallops instead. 


Depending on how much of the lining you would like to show as the top accent, take the measurement that you jotted down from the exterior sewn rectangle and add about 1" to 1.5" to the longest.  In my example the exterior was 14"x8.5" so I cut my lining 15.5"x8.5".  Note that the width remains unchanged.


Construct your lining in a similar way by sewing the sides, cutting the 1 1/2" squares from the bottom and boxing it.  A couple of things are different for the lining: You leave it wrong side out and you fold and press the top down 1/4" and then again to meet the exterior. 


Set the lining inside and fiddle with the amount of fold until it rests flush.  If the amount of fabric showing is more than you like, simply refold the 1/4" raw edge fold more to reduce the visible accent rim.  This flexibility to easily alter the look and have a forgiving fit is the way I like to work.


Machine stitch around the top to secure the lining.  You can see that I sewed close to the edges and through the middle of the lines but you can include as many passes as you like to make the top even more structured.  I used 2930 Golden Toast 50wt for piecing and 40wt for topstitching. 


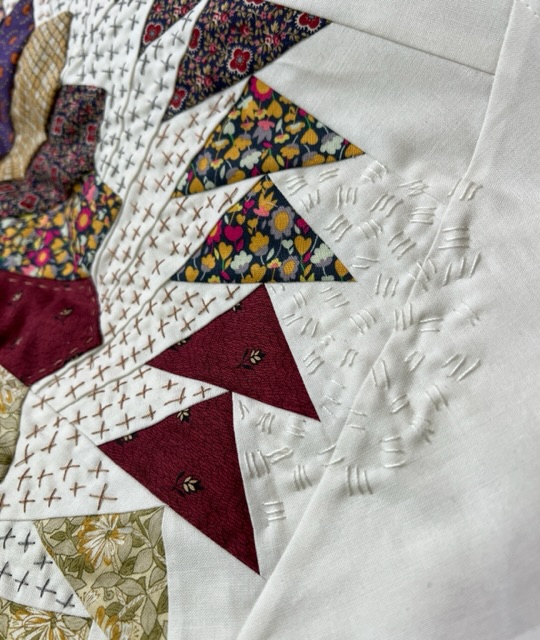
An alternative to topstitching multiple lines by machine is to hand sew with 12wt.  I love the look and texture it gives the rim of the floral bucket and think the treatment compliments the 40/3 wt channel stitching well.


This method is also more beginner friendly for those who struggle with aligning topstitching by machine.   I like not having to leave a side seam open for turning that needs to be sewn closed after like commonly done in other patterns.  


Fabric and batting scraps are perfect for this project and they make great gifts.  Even though similar quilted buckets are marketed as thread catchers for quilters, they come in handy for storing lots of other things too. 


Timing was perfect for these two projects.  I was able to complete both despite the busy holiday season and gift them to my swap partners without the stress of complicated construction.  Pairing fabrics and thread to personalize them for the recipients is where I'd rather focus my creative energy. 

Aurifil Threads : 
2930 Golden Toast 40 wt and 50 wt 
2715  Robins Egg Blue Fory/3 wt
2250 Red 12wt 
5020 Light Military Green Forty/3 wt


Thursday, October 26, 2023

Channel Quilting with Forty/3

Channel quilting may not be as glamorous as other techniques but it plays an important supporting role to help feature the piecing in a project and that's just as valuable.  For the Aurifil Artisan October challenge, I've put together a few examples. 


A straight vertical line of stitching using Aurifil Forty/3 thread has been my go to lately.  Finishes number 7, 12 and 15 in 2023 to be specific.  There is something quite satisfying about the repetition.  Back and forth, it's hard not to get the Beyonce Irreplaceable song lyrics "to the left to the left" stuck in my head, haha! 


Although I have been quilting this style with Aurifil 50 weight thread, I like the extra detail achieved with Forty/3 weight and it is nice and strong to hold up on the long arm.  The photo above shows how I load the quilt top sideways to make using the channel lock feature.  


These two are from Modern Quilt Studio mystery quilt alongs "Arrowhead" and "New Day" that I joined in along with a few friends. I have always been a fan of Weeks and Bill and they outdid themselves with fun themes and support for participants. 


Perfectly imperfect spacing was my goal so that the process was enjoyable - almost meditative - and the results have an even-ish visual flow without having to fuss with marking.   Choosing one thread color despite having a high contrast palette can be tricky.  I tend to lean towards the lighter because seeing the lines on the dark portion can be a nice graphic element and less dramatic since it can hold its own.


A finished quilt is not complete without a photoshoot. I purposely chose harsh lighting to accentuate the channel quilting.


You can really see the visual texture on this close up of a mini made during a Maria Shell "Pods" workshop.   When there's a lot going on in the piecing and composition, I feel that the linear quilting gives the quilt structure and does not compete for attention.


All of the piecing was done with Aurifil 50 weight thread 2326 , 2620 and probably more colors depending on which spool of Aurifil happened to be handy. 

Quilting Aurifil Forty/3 cone colors: 

2315 Shell

2370 Sandstone

5020 Light Military Green

Monday, August 28, 2023

Mindful Stitching


Mindful Stitching with 12wt thread for August's Aurifil Artisan Challenge was the reason to revisit a partially completed project - as this is my theme for the year.  I've got so many great starts that deserve a finish. 

I chose to alternate between Cafe' au Lait 2340 and Arctic Ice 2625 cotton in a plus pattern to visually blend the Dresden blades with the flying geese. 

Because listening to the seagulls squalk overhead while I stitched, they became flying gulls in my mind and the plusses became bird tracks in the sand. 

The outer background thread color Sea Biscuit 6722 is all about a subtle texture reading as a tone on tone. I purposely varied things again finding a nice rhythm while stitching “three seed” and deciding on where to position the next grouping, one cluster at a time.  


Initially, I auditioned a number of thread colors that all go with the fabric but in the end settled on the three neutrals that would bring out the best in the overall design and not distract from my piecing. 


The photoshoot was a little tricky on a bright sunny day and I ended up holding the corner of the quilt up away from the fence to catch the light and reveal the texture. The seagulls would fly in and out of camera range but I wasn't able to catch one in the picture.  


I'm so pleased with the end results and for pushing the hand stitching further given my limited experience.   The Thread House Virtual Retreat 7 was a lot of fun and it's nice to practice what I learned rather than leave the project as a flimsy. I've had it tacked up on my design wall as decoration so now I'll have to add a sleeve and give it a proper display. 


Be sure to check out the other Aurifil Artisan projects - they are as always - incredible. 

Happy Stitching 

Tuesday, July 18, 2023

Welcome Package Challenge Aurifil Artisan 2023-2024

Self Portrait Quilted

When I opened my Aurifil Artisan 2023-2024 Welcome Package the big bold cone of 2225 Salmon and large spool of 1104 Neon Orange immediately caught my eye and I knew they would pair perfectly to quilt my recently made Self Portrait fabric collage.  


Aurifil Artisan 2023-2024 Team

You may have seen on my Instagram feed and stories the unboxing of this beautiful selection of thread including thread weights 80 wt, 50 wt, 40 wt, Forty/3, 28 wt, 12 wt, floss and monofilament - and the assortment of colors, just wow! 


I'm not sure how else I would have been able to decide on which weight and color to start with for our first challenge so it was nice to have a clear direction.


Color 2225 Salmon Cone 
Without a lot of experience working so literal rather than abstract, I have to admit that the entire process including stitching free-style on my self portrait was a bit unnerving.  The small patterns and cross hatch in the fabric was my quilting motif inspiration, especially for the background. 


It made sense to simply use a cut off chunk from a quilt project since I only needed a small piece.  Hobbs 80/20 batting and flannel backing did the trick.

Stash Binding 

Another light bulb moment happened when it was time to bind.  Years ago I picked up a roll of ready made double fold bias tape from our local quilt show sale.  

The Backside

For the hand stitching of the binding to the back, I used 2692 Black 50wt.

Finished Self Portrait

The close crop at the top was intentional when I printed the pattern to cut out but I'm not sure it looks as successful as I had hoped it would and my forehead feels awkwardly interrupted in the composition.  Experimenting is a good thing when trying new techniques and there's a lot that I am pleased with especially my threads - so it's all good. 

 Paper Parts

Orange you glad that I turned my UFO into a finish? I know I am.

Happy Stitching, Karen


Tuesday, May 23, 2023

Me Made May - Cuff Tops

Inspired to participate in the May Aurifil Artisan challenge, I decided to try a new pattern and ended up making it three times. 

Because there’s a lot of topstitching in the Cuff Top pattern, I auditioned and strategically chose 1147 Light Leaf Green 40wt to blend well with the multicolored palette of the floral fabric from my stash, a vintage loose weave gauze. 

The next make was an easy pick for the thread color, 2785 Dark Navy to complement the indigo block print cotton.  Cut slightly boxier, I put the pattern on the fold without reducing for the center seam allowance called for in the original instructions.  


On a roll with my garment sewing success and curious how a knit might turn out, I whipped up a third and final with 50 wt Light Beige 2310 remembering to use a jersey needle and the stretch stitch setting on my machine. 


My friend destashed a roll of thin muslin to me and it has saved me from having to buy pattern tracing fabric - a bonus!  


Before the Cuff Tops

Following a pattern is much quicker than self drafting like I did for this blouse made for my granddaughter.  She's happy with it and that's all that matters. 


50wt Aurifil Slate 6720 was the perfect blue thread and our pink rhododendron a picturesque backdrop.  Now I can get back to filling up my design wall with quilting again! 


Monday, April 24, 2023

Britches- Upcycle for Earth Day

 Playing with Parts and Possibilities is a process more so than a pattern that I have taught and made many times but never before using the fabric from four different pairs of deconstructed pants.  The Aurifil Artisan Challenge for April was the ideal opportunity and celebration of Earth Day. 


Along with my curved improv abstraction blocks, I combined traditional blocks, some freehand cut and others like the half square triangles using the Accuquilt cutter. 


Pieced with 50wt 2600, quilted with 40/3wt 4250 variegated and finished off with 12wt 2530 trying big stitch by hand on the binding,  Aurifil threads made for great teamwork . 


The two pants with 100 percent cotton content were much easier to deal with than the other two with 5 percent stretch.  The jean weight took some getting used to but fortunately, unlike my previous attempts with velvet and corduroy deconstructed pants, these did not shed. 


I purposely kept the size smaller 35" x 45" to avoid an unreasonable amount of weight for the finished quilt.


Keeping in the spirit of Earth Day, I also used scraps of leftover batting patched together.   With a graphic design for the piecing, I opted to go with a mix of playful designs on the quilting motif. 

Pressing with steam (thank you Oliso) and open seams helped with bulk and I did take my time stitching over the multiple layers. 

After a long and wet winter, the weather has been beautiful lately.  My finished BeeSewcial blocks for Debbie's April prompt "Albersesque" look so vibrant tossed on my Britches quilt don't you think? From the Josef Albers book Interaction of Color 50th Anniversary Edition, I chose inspiration from the transparence and space illusion chapter.